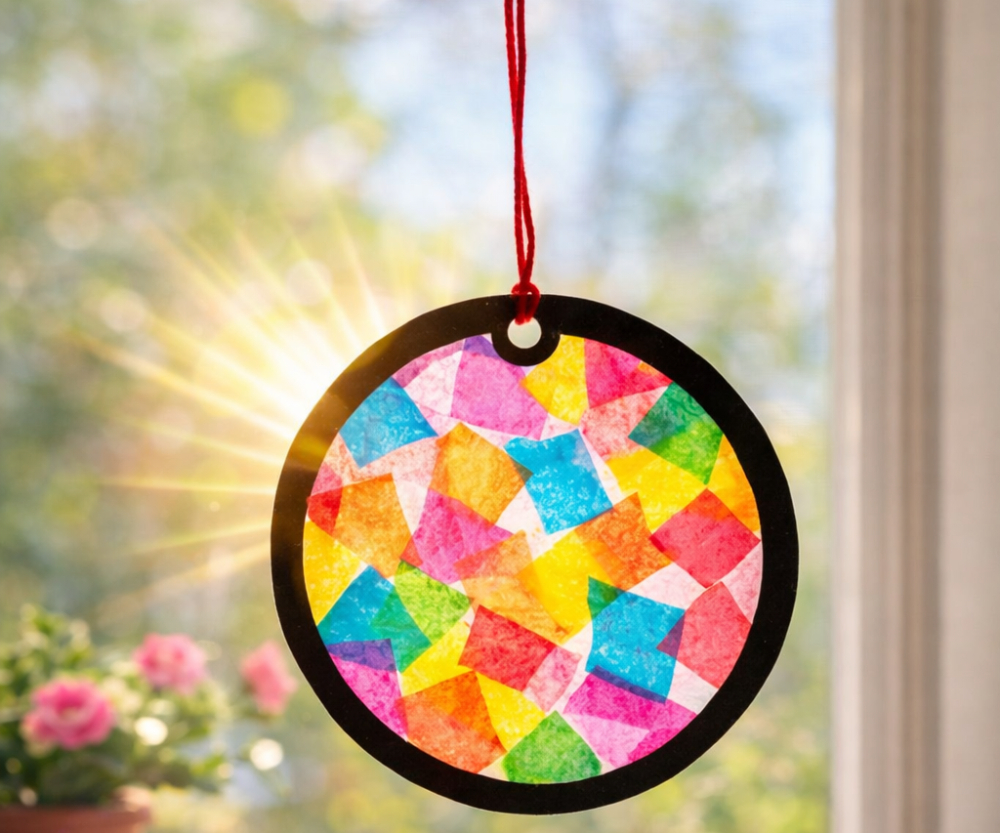
Do you like colorful decorations that shine in the sunlight? A Sun Catcher is a fun craft that looks beautiful when sunlight passes through it. With some tissue paper and simple materials, kids can make a bright decoration for windows.
Let’s learn how to make a DIY Sun Catcher!
🧰 Things You Will Need
- Tissue paper (different colors)
- Transparent plastic sheet / clear file / butter paper
- Glue
- Scissors
- Black chart paper (optional for frame)
- String or ribbon
Ask an adult to help when using scissors.
✂️ Step-by-Step Instructions
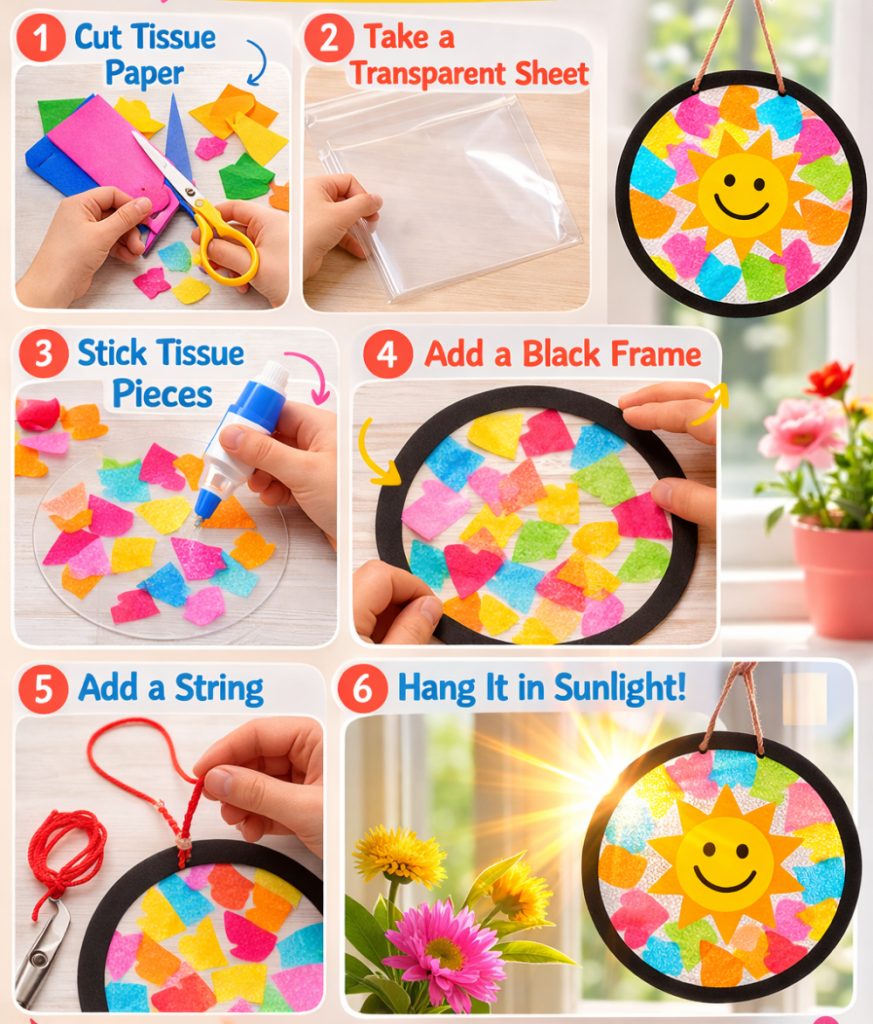
1️⃣ Cut the Tissue Paper
Cut small pieces of colorful tissue paper into squares, circles, or any shapes you like.
2️⃣ Prepare the Base
Take a transparent plastic sheet or butter paper. This will be the base of your sun catcher.
3️⃣ Stick the Tissue Pieces
Apply glue and stick the colorful tissue pieces on the sheet. Overlap them to make beautiful color patterns.
4️⃣ Add a Frame
Cut a circle or any shape from black chart paper and paste it around the edges to make a nice frame.
5️⃣ Add a String
Make a small hole at the top and tie a string or ribbon.
🌞 Hang It in the Sunlight
Hang your sun catcher near a window where sunlight comes in. When sunlight passes through the colorful tissue paper, it creates beautiful glowing colors!
🌟 Why Kids Love This Craft
- Easy and fun to make
- Improves creativity
- Makes colorful window decorations
- Perfect activity for home or school
A simple craft can turn sunlight into beautiful colors! Try making your own DIY Sun Catcher and brighten your room with glowing rainbow light. ☀️🌈
If you want, I can also generate step-by-step images for this sun catcher craft for your kids’ blog.
