A Fun and Easy Craft for Kids
Do you have empty boxes, cans, or bottles at home? Don’t throw them away! You can turn them into a cool pencil holder for your study table. This craft is simple, fun, and helps us reuse waste materials.
Let’s make a pencil holder step by step!
🧰 Things You Will Need
- An empty tin can / plastic bottle / small cardboard box
- Colored paper or gift wrap
- Glue
- Scissors
- Stickers, ribbons, or markers for decoration
Ask an adult for help while using scissors.
✂️ Step-by-Step Instructions
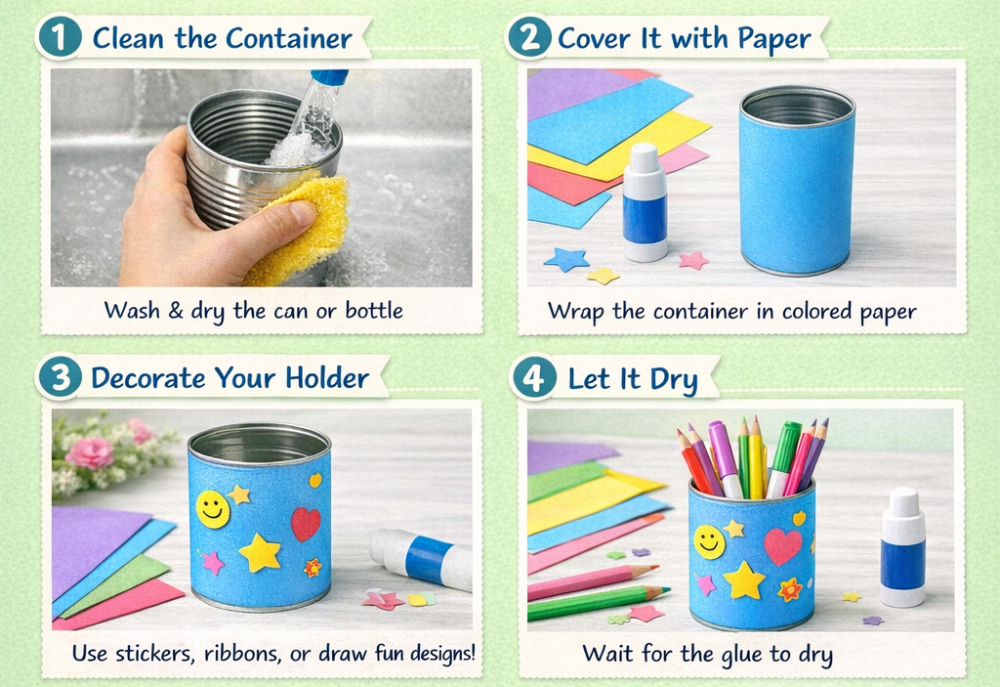
1️⃣ Clean the Container
Take an empty tin can, plastic bottle, or box. Wash and dry it properly.
2️⃣ Cover It with Paper
Cut colored paper to fit around the container. Glue it nicely so the whole container is covered.
3️⃣ Decorate Your Holder
Now comes the fun part! Decorate it with:
- Stickers
- Drawings
- Glitter
- Ribbons
Make it as colorful as you like.
4️⃣ Let It Dry
Wait for the glue to dry properly so the decorations stay in place.
5️⃣ Add Your Stationery
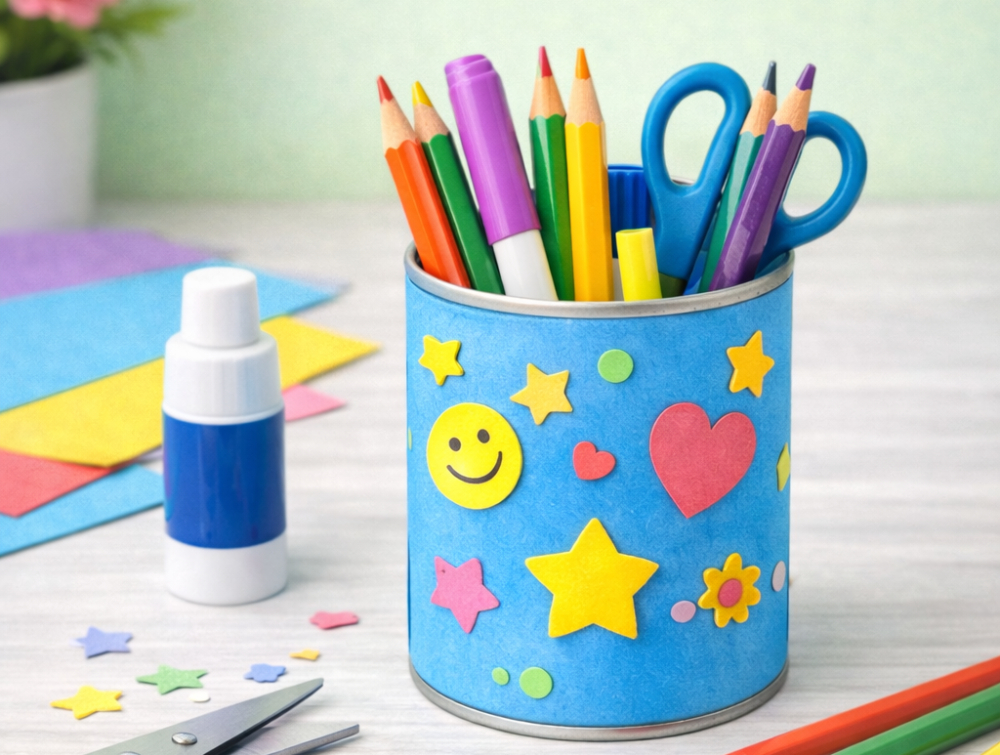
Your pencil holder is ready! Put your pencils, pens, crayons, and markers inside.
🌟 Why This Craft Is Great
- Helps reuse waste materials
- Keeps your study table clean and organized
- Improves creativity and crafting skills
- Fun activity for kids at home or school
🌍 A Small Step to Help the Planet
When we reuse waste materials, we help protect our planet. Small crafts like this teach us how to reduce, reuse, and recycle.
With a little creativity, even waste materials can become something useful and beautiful. Try making your own DIY pencil holder and make your study table bright and tidy! ✏️✨
If you want, I can also create step-by-step images for this pencil holder craft (great for kids’ blogs).